
DTF transfers for beginners open up exciting possibilities for personalizing apparel with less setup than traditional screen printing. DTF printing for beginners offers a forgiving workflow that yields vibrant colors on T-shirts, hoodies, and bags. This guide walks you through the DTF transfer process step by step, from design to the final cure. You’ll learn how to apply DTF transfers, understand DTF transfers troubleshooting, and keep designs durable through regular washing. For many projects, DTF vs screen printing becomes a clear choice for beginners seeking flexibility and cost efficiency.
In alternative terms, this garment-decoration method involves printing designs onto a specialty film, applying adhesive powder, and bonding the image to fabric with heat. For newcomers, this film-to-fabric technique provides a user-friendly entry point into custom apparel without the need for screens. Think of it as a film-based color transfer that works across cotton, blends, and even dark textiles when the right materials are used. From an SEO and LSI perspective, practitioners talk about direct-to-film transfers, heat-press application, and multi-color fabric printing as closely related concepts. In practice, you’ll emphasize setup, testing, and proper curing to ensure durable, wash-safe results.
DTF transfers for beginners: a friendly entry into garment customization
DTF transfers for beginners open up exciting possibilities for personalizing apparel without the complexity of traditional screen printing. This approach offers a forgiving workflow, strong color reproduction, and compatibility with a wide range of fabrics, including cotton blends. With DTF you can create vibrant designs on T-shirts, hoodies, bags, and more, while keeping startup costs approachable. Adopting a Start-to-Finish mindset helps new makers focus on one complete project, learning design, printing, powdering, curing, and transferring in a coherent sequence.
For those exploring DTF printing for beginners, starting with a simple motif and a low-stakes garment makes the learning curve manageable. Keep a log of settings and results, compare heat times, ink densities, and powder thickness, and iterate. This practice builds confidence and minimizes costly mistakes as you move toward more complex, multi-color designs.
DTF printing for beginners: essential tools, materials, and setup
A practical starter kit for DTF printing includes a compatible printer capable of white ink, DTF-ready PET film and release film, adhesive powder, a powder shaker, a curing oven or heat source, and a reliable heat press. You’ll also need design software that supports color separation and a few test garments to practice on. Choosing reliable films and inks is essential for consistent results.
Setting up the workspace with proper ventilation and organized storage helps a beginner stay focused. Start with 100% cotton or cotton-rich blends, as they tend to bond well with the adhesive and show bright color. Keeping a small library of test patterns and documented temperatures will speed future projects.
DTF transfer process step by step: from design to final cure
The DTF transfer process step by step begins with design preparation, followed by printing on DTF film, applying adhesive powder, curing the powder, transferring to fabric, and finishing with a final press. Each stage plays a critical role in durability and image quality. Designers should keep artwork simple at first, using clear color separations and high-contrast shapes to minimize misregistration.
In practice, keep nozzle health and ink density steady during printing, dust the powder evenly, cure according to the adhesive’s instructions, and align the film carefully on the garment. Typical heat settings are around 160C (320F) for about 12–15 seconds with medium pressure, though you should confirm with your specific film and adhesive before starting a larger run.
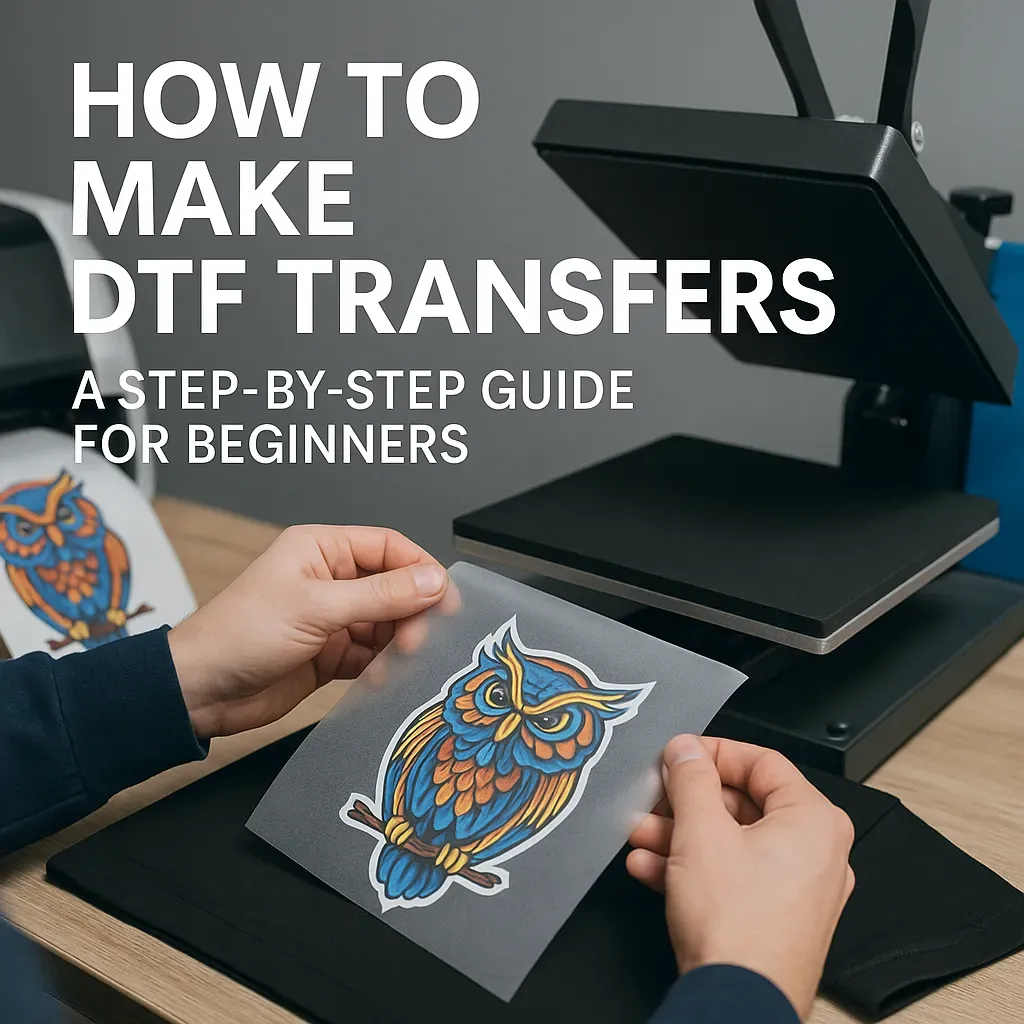
How to apply DTF transfers: best practices for precise results
Pre-press the garment for 3–5 seconds to remove moisture and wrinkles, then position the transfer with alignment marks or a grid. Maintaining consistent pressure and even contact is key; use a heat press with reliable temperature control and a flat pressing surface to avoid pocketing or shifting.
Follow manufacturer guidelines for temperature and time, then run a test patch when using new film or adhesive. Allow the garment to cool fully and wait 24–48 hours before washing to preserve color and adhesion.
DTF troubleshooting: common issues and practical fixes
Even with care, problems can occur. Peeling after washing often points to insufficient curing or weak adhesive activity. Reassess the curing step, ensure the powder was properly bonded, and confirm you followed the recommended dwell time and temperature. Fading color or dull print can result from ink density or improper heat, so adjust color management and recapture sharper edges in future tests. Bleeding or color bleed between elements may indicate inadequate artwork separation or substrate shrinkage.
Sticky or gummy film usually signals under-curing or film-adhesive incompatibility. Re-verify your film and adhesive compatibility and perform a small patch test before proceeding. Misalignment is common for beginners—practice on inexpensive garments, use registration tools, and refine your setup until you achieve repeatable alignment.
DTF vs screen printing: choosing the right method for your project
DTF offers a friendly entry point for beginners, especially for small runs and designs with gradients or complex color work. It supports a broad fabric range, including dark textiles, with relatively quick setup and fewer color-change limitations. This makes it an attractive option for iterative testing and rapid production while keeping costs manageable.
Screen printing excels when you predict large volumes or require ultra-dense inks on specific substrates. It often demands more upfront investment in screens and setup, but per-piece costs can drop with bigger runs. For many new makers, starting with DTF and gradually expanding into screen printing as volumes grow provides a practical growth path.
Frequently Asked Questions
What are DTF transfers for beginners and what makes them beginner-friendly?
DTF transfers for beginners refer to Direct-to-Film designs that are easy to learn and affordable for newcomers. They offer a forgiving workflow, work on a wide range of fabrics, and let you progress from design to print, powdering, curing, and transfer with a simple Start to Finish approach.
DTF printing for beginners: what is the transfer process step by step?
Here is the transfer process step by step for DTF printing for beginners: design and prepare artwork; print on DTF film; apply adhesive powder; cure the powder; transfer to fabric with heat and pressure; peel the film according to the guidelines (hot or cold); test and adjust as needed.
How to apply DTF transfers: a practical guide for beginners.
To apply DTF transfers as a beginner, pre-press the garment, align the transfer using marks, press at the recommended temperature and time, then peel per film guidelines (hot or cold). Allow the garment to cool and follow washing instructions to preserve color.
DTF transfers troubleshooting: common issues and fixes.
Common issues and fixes for DTF transfers troubleshooting include: peeling after washing—revisit curing; faded color—check ink density and heat settings; bleeding—verify proper artwork separation and shrinkage allowances; sticky film—confirm film-adhesive compatibility and cure; misalignment—practice on inexpensive garments and use alignment aids.
DTF vs screen printing: when should a beginner choose DTF?
DTF transfer vs screen printing: for beginners, DTF is often the better starting point due to lower setup costs, ability to handle multi-color designs without separate screens, and good results on a variety of fabrics including darks. Screen printing shines for large runs and ultra-bright colors but requires more upfront investment and setup. Choose DTF for small batches or complex color work, and consider screen printing as volumes grow.
What tools, materials, and workspace setup do I need for DTF printing for beginners?
Essential tools for DTF printing for beginners include: a printer capable of white ink and color, DTF film and release film, adhesive powder, a powder shaker, a curing oven or heat source, a heat press, and design software. You will also need blank garments, a clean workspace, and basic PPE. Start small to learn the workflow before scaling.
| Key Point | Description / Guidance | Why It Matters for Beginners |
|---|---|---|
| Introduction to DTF for Beginners | DTF transfers enable vibrant, multi-color designs without the grading scale of traditional screen printing; a Start-to-Finish project framework guides beginners from design to final transfer. | Sets scope, reduces intimidation, and frames a learning path for new creators. |
| What you’ll gain | Overview of DTF, a practical beginner workflow (design, printing, powdering, curing, transferring), plus troubleshooting and a comparison with screen printing. | Clarifies learning outcomes and helps when deciding which method suits your project. |
| What is DTF printing? | Direct-to-film prints on PET film, coated with adhesive powder, cured, then pressed onto fabric. Works on cotton, blends, and dark fabrics with the right film and inks; forgiving workflow for beginners. | Defines the process and makes it accessible to newcomers. |
| Tools and materials | Printer with white ink; DTF film and release film; adhesive powder; powder shaker; curing oven or heat source; heat press; transfer designs; suitable garments (100% cotton or cotton-rich). | Lists essentials to minimize setup friction for beginners. |
| DTF printing process steps | Artwork prep; print on film; apply and cure powder; transfer to garment; final press; peel as directed. | Provides a clear end-to-end workflow. |
| Design and preparation | Create source art with high resolution and bold colors; use simple palettes to reduce misregistration; export print-ready files (PNG or TIFF with transparency). | Improves accuracy and reduces common errors for newcomers. |
| Transferring and settings | Position the cured film; use heat around 160°C (320°F) for 12–15 seconds with medium pressure; adjust per film/adhesive; consider iron as an alternative with longer time. | Gives starting points for parameter setup and adjustments. |
| Practical application tips | Pre-press 3–5 seconds; align with marks or grid; test patches; maintain consistent pressure; post-press care (cooling, 24–48 hour wait before washing). | Boosts consistency and longevity of transfers. |
| Troubleshooting | Peeling after washing; faded color; bleeding; sticky film; misalignment; ensure proper curing, ink density, film compatibility; patch tests recommended. | Prepares for common issues with practical remedies. |
| Start-to-Finish project plan | Week 1: basics and workspace setup; Week 2: print, powder, cure on test swatches; Week 3: apply transfers to practice garments; Week 4: launch a small batch and evaluate durability. | Provides a structured, beginner-friendly roadmap. |
Summary
DTF transfers for beginners offer a practical, scalable path to professional-looking garment customization. By following a Start-to-Finish workflow—from design to print, powder, cure, and transfer—beginners can achieve vibrant results with relatively low startup costs. This Descriptive overview highlights essential tools, clear steps, and troubleshooting strategies that help you avoid common issues like misalignment, incomplete cures, or color bleed. Compared with traditional screen printing, DTF transfers for beginners provide faster iteration, compatibility with a wide range of fabrics (including dark garments), and a gentler learning curve for solo makers or small hobby businesses. With consistent practice and careful attention to curing and pressure, you’ll build confidence, produce durable transfers, and gradually take on more complex designs or larger runs while staying budget-conscious. Whether you’re creating a single custom shirt or launching a small hoodie line, mastering the Start to Finish project framework can save time, money, and frustration as you grow your DTF skills and expand your offerings over time.