
DTF transfers have transformed fabric customization, delivering bold, multi-color designs with impressive ease and repeatable results. For newcomers, the journey often starts by understanding how this direct-to-film approach compares to traditional methods like DTF printing and even DTF vs screen printing. As you explore, you will learn about the essential workflow, the equipment involved, and how a steady DTF printer setup can produce reliable, vibrant transfers. With the right materials, including high-quality transfer film and adhesive powder, DTF transfers can be applied to cotton, blends, and many other fabrics. This guide helps you start confidently, outlining best practices, testing methods, and care tips to keep your prints looking sharp.
Seen through a broader lens, the film-backed printing approach for textiles, sometimes called the direct-to-film method, offers a flexible path from digital artwork to wearable art. In this alternative framing, the process centers on printing onto a PET transfer film, layering adhesive powder, and using heat and pressure to bond the image to fabric; concepts familiar to anyone exploring film-based transfers. Other phrasing, such as the DTF process or transfer-on-film technology, highlights the same workflow while appealing to readers researching printer setups and workflow optimization. By thinking in related terms, designers can compare outcomes with screen printing, sublimation, or vinyl transfers and choose the best fit for fabrics, colors, and budgets.
DTF Transfers Demystified: From Film to Fabric
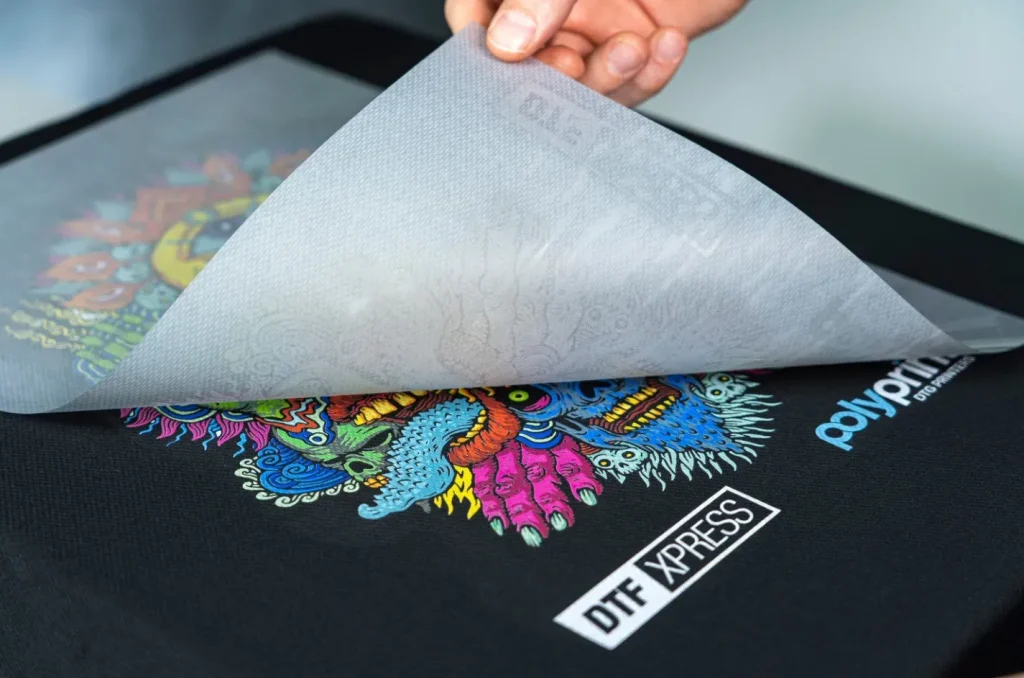
DTF transfers involve printing a design onto a PET film and then bonding that film to fabric using heat and pressure. This process blends digital printing with a film-based transfer, enabling application to cotton, blends, and some poly fabrics. For beginners, the workflow can feel forgiving, yet it rewards careful preparation of artwork, proper adhesive powder application, and reliable curing to ensure strong adhesion and vibrant color.
In practice, DTF transfers (also called direct-to-film transfers) offer a pathway from concept to wearable that supports multi-color artwork with sharp details and smooth gradients. By focusing on the artwork preparation, selecting the right powders and resins, and dialing in the heat press, you can achieve durable, soft-hand prints with a wide range of fabrics. This approach aligns with the growing interest in DTF printing as a versatile printing method for hobbyists and small businesses alike.
DTF Printing vs Screen Printing: Which Method Fits Your Project
DTF printing is often contrasted with traditional screen printing. Screen printing requires creating screens for each color, which can add setup time and cost for intricate, multi-color designs. In contrast, DTF transfers let you reproduce complex artwork with many colors without the same level of prepress investment, making it ideal for small runs and rapid prototyping.
For beginners and small shops, DTF printing shines when you want gradients, photo-like imagery, and fine lettering without the high upfront cost of screen setups. The choice between DTF and screen printing depends on your fabric choices, order volume, and durability requirements, but the DTF route frequently wins on flexibility, color richness, and speed for shorter runs.
Setting Up Your DTF Printer: A Beginner’s Guide to DTF Printer Setup
A solid DTF printer setup starts with selecting a printer capable of high-resolution color output and a workflow compatible with DTF transfer film. You’ll also need the right inks, DTF transfer film, and adhesive powder, plus a curing or heat press solution and basic heat management accessories. Paying attention to the printer’s color profile, resolution, and maintenance schedule will pay dividends in consistent output.
Regular maintenance, including printhead cleaning and nozzle checks, helps prevent misprints and ghosting. Calibrating color profiles, verifying white under-base operations for dark fabrics, and keeping records of temperatures and dwell times for different films will make your DTF printer setup more repeatable and scalable as you expand your designs.
Design to Transfer: The Complete DTF Transfer Workflow
The journey from design to transfer begins with artwork prepared for print, including correct color management, bleed, and resolution. For best results, aim for at least 300 dpi at the final print size and use color separations that preserve skin tones and gradients. If you’re printing on dark fabrics, plan for a white under-base or light base to preserve brightness after transfer.
The core workflow runs through printing onto the DTF transfer film, applying an adhesive powder, curing the powder, and finally heat pressing the film onto the garment. Depending on the film and powder, press temperatures typically range in the 160–180°C area for 10–20 seconds, with pressure adjusted for fabric type, followed by careful cooling and film removal to reveal a vibrant, durable image.
Troubleshooting and Quality Control for Durable DTF Transfers
Newcomers often encounter ghosting, cracking, or misregistration. Common causes include insufficient powder adhesion, incomplete curing, or incorrect heat-press timing. A systematic approach—verify the powder coating is uniform, confirm film curing, and run test passes on similar fabrics—helps pinpoint where the issue originates and streamlines fixes.
Quality control is about consistency and washing durability. Inspect adhesion uniformity, trim film edges, and perform wash tests to confirm color fastness and layer integrity. Providing clear care instructions to customers, such as avoiding high heat on printed areas and using gentle cycles, protects the print and reinforces long-term satisfaction.
Scaling Your DTF Transfers: From Hobbyist to Small Brand
Once you have reliable results, you can scale by standardizing workflow, building a library of design templates, and offering a small catalog of apparel options. Standard operating procedures, batch templates, and repeatable settings help you grow without sacrificing quality. This scalability is one of DTF transfers’ key strengths for hobbyists turning into small businesses.
As you expand, explore design services, custom prints, and collaborations with local brands to widen your reach. Consider investing in additional garment options, streamlining order management, and refining pricing to balance profitability with competitive pricing. With careful planning and consistent execution, you can transition from a hands-on hobby to a sustainable DTF transfers business.
Frequently Asked Questions
What are DTF transfers and how does the DTF printing process work?
DTF transfers (direct-to-film transfers) involve printing a design onto a PET film using suitable inks, applying an adhesive powder, curing it, and then transferring the design to fabric with heat and pressure. The result is durable, vibrant prints that work well on cotton, blends, and some poly fabrics, making DTF printing a versatile option for textile projects.
How do I optimize DTF printer setup for reliable DTF transfers results?
For reliable DTF transfers, start with a printer that supports strong color density and use approved DTF transfer film and inks. Calibrate color profiles, ensure consistent powder application and curing, and use a quality heat press with the right temperature, pressure, and dwell time. Run test prints and document your settings for future batches.
DTF transfers vs screen printing: which method is best for beginners and small runs?
DTF transfers offer low setup costs and great multi-color capability, making them ideal for beginners and small runs. Screen printing is cost-effective for large-volume orders with fewer colors. Choose DTF printing for flexibility and quicker turnaround, or screen printing when you need the lowest per-unit cost at scale.
What equipment and materials do I need to start with DTF transfers?
Essential gear includes a capable printer, DTF transfer film, compatible inks, adhesive powder, a curing oven or heat press, and heat press accessories (Teflon sheets, thermometer). Also have cleaning supplies and a dedicated workspace for pre- and post-press steps.
How should I prepare artwork for DTF transfers to ensure vibrant prints on various fabrics?
Prepare artwork with CMYK color profiles at around 300 dpi, ensuring clean edges and sufficient resolution. For dark fabrics, plan a white under-base to preserve brightness, and avoid overly tiny details. Save files in print-ready formats and test alignment before production runs.
What are common issues in DTF transfers and how can I troubleshoot ghosting, misregistration, or cracking?
Common issues include ghosting, misregistration, and cracking. Troubleshoot by confirming proper adhesive powder adhesion and complete curing, checking heat press temperature and dwell time, ensuring even pressure, and verifying artwork alignment. Regular printer maintenance and process calibration help prevent recurring problems.
| Topic | Key Points |
|---|---|
| What are DTF transfers | Direct-to-film process: artwork is printed on PET film, adhesive powder is added and melted, then heat-pressed to fabric for a durable, flexible image that supports multiple colors and washes. Works on cotton, blends, and some poly fabrics. |
| Why beginners like DTF transfers | Supports complex, multi-color artwork without screens; repeatable once printer, powder, and heat press settings are dialed in; lower setup costs and broad fabric compatibility. |
| Fabrics and compatibility | Versatile across cotton, blends, and some poly fabrics; suitable for a wide range of garment types with proper curing and settings. |
| Essential equipment | Reliable color printer; DTF transfer film; inks suitable for the film; adhesive powder; curing oven or heat press; heat press accessories (Teflon or silicone sheets, thermometer); cleaning supplies. |
| Basic workflow | Prepare artwork (CMYK), print on film, apply and cure adhesive powder, place film on garment, apply heat and pressure, then peel after cooling. |
| Design preparation | Optimize artwork for film/inks; aim for 300 dpi at final print size; use appropriate color separations; plan white under-base for dark fabrics to preserve brightness. |
| Heat press technique | Typical settings start around 165–175°C for 12–18 seconds with medium to light pressure; use silicone/Teflon sheets; run tests on similar fabrics to dial in timing and temperature. |
| Troubleshooting and QA | Ghosting, cracking/peeling, color bleed/misalignment, or sticky transfers can occur; fix with proper powder adhesion, sufficient curing, accurate temperature/time, and good alignment; perform wash tests and inspect finishes. |
| DTF vs other methods | Advantages for small runs and multicolor designs; lower setup than screen printing; better for intricate graphics and gradients; broader fabric compatibility than sublimation on many fabrics. |
| Maintenance and scaling | Keep printers, presses, and films clean; calibrate color profiles; log successful settings; build design templates and consider services or partnerships to expand reach. |
Summary
Conclusion for DTF transfers: DTF transfers open a viable path to beautiful, durable prints for beginners and seasoned crafters alike. By understanding the core concepts of direct-to-film transfers, investing in the right materials, and mastering a few reliable settings for your heat press, you can achieve professional results with a relatively approachable learning curve. As you gain experience, you’ll discover how to optimize your artwork and workflow, experiment with different fabrics, and produce high-quality apparel that stands out in both style and longevity. If you’re looking to start or refine your DTF printing journey, remember that consistency, patience, and attention to detail are your best allies on the road to successful, repeatable DTF transfers.